Pricing Handmade Items: Strategies for Creative Entrepreneurs
Let me guess, you're getting started with your craft business and you just typed 'pricing handmade items' into Google...?
It's all good, I'm pretty sure every single artist who has ever started a handmade business did the same thing at one point too (me included!).
But you're in the right place - and good for you for doing your research. As you already probably know, it's super important to pinpoint the perfect price point that will both appeal to your customer AND allow you to build a sustainable and profitable business.
Price your crafts too high, your customers won't buy. Price too low...you won't make a profit and you may as well have a hobby, not a handmade business. Womp, womp.
There's nothing worse than selling a product you spent a lot of effort creating, and feeling resentful when it sells. So, in the effort to help you find the perfect pricing for your craft items, this post will guide you through each step of the process and allow you to feel confident about the prices you're setting. Let's dig in.
The Basics of Pricing Handmade Products
Pricing can get confusing, especially because I can read the room here and know that I'm speaking to a bunch of cute, right-brained creatives that may or may not hate life when forced to do math.
If that sounds like you, don't worry, many other right-brained friends have come before you and made a very successful living selling their handmade crafts and running their own business. We're just going to start with the basics (also, once you're making a little income you can outsource the business tasks you don't like. Like math. Yay!)
Pricing is more of an art than a science because, while you can easily reference a pricing formula to get the 'right price', there's also perceived value, price anchoring, and other factors you'll need to take into consideration.
So it's not as cut and dry as you might think. Of course you'll need to include the most obvious things like cost of materials, labor costs, and overhead costs. But also factoring in your profit margin (for retail and wholesale items) and then perceived value have a little nuance to them.
In short, just understand that pricing takes a little time to master. Once you start selling regularly you'll have a much more clear view on what pricing feels good to you, what items are selling easily, which ones you can probably increase the price on, and you can also test your pricing! No need to get it perfect on the first shot.
Let's jump in :)
Calculating Your Costs: A Step-by-Step Guide
Material and Production Costs
I want to keep this as simple as possible, so let's start out with the most obvious costs we need to include, which will be your materials cost.
This is the easiest part to calculate because there is not much to think about. You need to look at every supply cost, add it up, and that amount will be added into the item cost for that product.
Cool, cool, but how do you calculate a length of yarn? Or 25 beads? Or a glob of resin? Seems tricky but just keep it simple. If one skein of yarn costs you $8, figure out what fraction or percentage of that skein you are actually using in each item you're making. Then just do the math, so multiply that percentage by the $8 to get the cost for that one supply item.
This same process applies for beads, feathers, or anything else that comes in a larger package (which, if you're doing it right and purchasing all your supplies wholesale, it will!).
Don't forget to include the costs of your packaging. This might include hang tags, ribbon, customized tape or tissue paper, and/or any business cards or promo materials you normally include with each purchase.
One quick note: if you already have old yarn or a stockpile of craft supplies on hand that you need to get rid of and are using that to make your products - you STILL need to include that cost into the price. Just because you bought it a while ago and it's been sitting around doesn't mean that you don't charge for the use of it. You did buy it at one point and you should account for that.
Add up each supply cost to understand what your basic materials cost will be. We'll keep that number ready so we can add it into your total costs at the end. But first, let's calculate your time and labor.
Labor Costs and Your Time
Before we talk about paying yourself, I really need you to think hard here and go back to your why. Why you're selling your art in the first place. What you really want to achieve with this craft business, and why you're putting in all this hard work. Because calculating labor costs are where many artists end up sabotaging themselves.
If your why is to quit your day job, be your own boss, and cover all your bills and more so you can live a lovely, carefree, and comfortable life on your own terms - you have to get this part right.
If your why is to bring in an extra side income so you can have either some fun money or put it towards your kids college fund - you have to get this part right.
It's sad, but true, that many many artists are not paying themselves fairly for the time they are putting in to make their products. They see their time as worth little value, and sweep it under the rug. DO NOT DO THIS!
If you've gone to the trouble to start a successful online craft business instead of keeping your craft a fun hobby, then please do me a solid and pay yourself fairly for your time.
Now that we've established the importance of labor costs, how do you calculate it?
This part is a little trickier, but here are some guidelines. Remember, you can always adjust your pricing later if needed!
First you need to consider what you will pay yourself as an hourly wage. How much is an hour of your time worth? (I told you this was hard!)
To find this, you might consider your local minimum wage. I don't recommend choosing a number that low, but you do you. It's whatever you're comfortable with, and you can always change it later.
However, I urge you to not go any lower than minimum wage. Our goal here is to make a profit and you can't calculate an accurate price unless you are fairly reimbursing yourself for the time you spend making a product.
Once you find this number, you can start timing your work and adding that into the price of your products. So if your hourly wage will be $15, if putting together 1 set of earrings takes 40 minutes, you'll add on $6 to your price to reflect that.
Once you have that number, it's pretty easy to divide it up and add it into your pricing.
BUT DANI, WHAT IF I TAKE 7,000 BREAKS WHILE I’M WORKING?
I got this question multiple times this week! Pretty funny because I do the same, so I know there are others with the same question :)
Here’s my take:
Strap yourself in and time yourself just one time, making your product without any breaks. Just once. And hang onto that number.
If that isn’t possible because it really does take that long, then start a timer while you’re working and stop it when you need a break. Record that number and restart a new timer when you start up again. Record that number.
Rinse and repeat until the project is finished and add up the time from all work sessions. Now you have your labor time set and you can apply it towards your pricing for that product.
Note: I would also redo this process in a few months and see if you have a faster time then. You’ll probably get more efficient as time goes on and you can adjust your prices if you feel it’s necessary.
Overhead and Operating Expenses
This next part is a little subjective as well, but I want you to take it seriously. Because if (or when) you start scaling your business, this will come back to bite you if you didn't set it up correctly.
Overhead is just a fancy way of saying any business expenses that are not directly linked to a single product. So you'll want to consider pretty much anything else like:
marketing costs and fees
wear and tear on tools you use to make your products
studio rent and utilities
website costs, web design, domain name fee
annual expenses like a license or membership
a new sewing machine or new piece of equipment
ads and promotion costs
gas if you're driving a lot for business related reasons
shipping materials like boxes, tape, or biodegradable packing peanuts
any equipment used for photography
craft show fees, display racks or any props you purchased
any educational material like courses or books
accounting or legal fees
There are also overhead wages you'll need to pay yourself as well, for example:
time you spent photographing
listing each product
responding to emails
packing orders
taking packages to the post office
...there's a lot to consider here, but in general it's mostly your recurring expenses.
Start adding up every little expense that goes into running your business (which do not directly go into the making of your products). Once you've got that number (the full year's worth of expenses/overhead) you can divide that by the number of products you that you're planning on creating for the year.
So for example, if your yearly overhead cost is $850 and you'll be making 300 items that year, you'll add $2.83 to each item you sell to recoup that lost cost along with the materials and labor costs. This way, you won't slowly be bleeding money despite a high amount of sales.
If your overhead number is coming out to a crazy amount and is making your price per item skyrocket, you might consider lowering your overhead costs by reducing expenses, or raising your prices across the board if you think it won't affect your sales too much (refer to the perceived value part of this post in that case!).
Adding Profit Margin to Your Pricing Strategy
I keep wanting to write "this is so important!" for every stage of pricing because each stage IS so important. One wrong move and your creative business is losing money. Which defeats the entire point of running a business! But no pressure :)
But this part...just promise me you won't skip this part.
Let's talk profit. We've already calculated your material costs, your labor, and your overhead per item. Now we need to add in a healthy profit margin so that you can MAKE THAT MONEY giirrrrl.
You need to maintain profitable prices so that you can:
start paying yourself for all the hard work you've done
invest back into your business (ie: purchase equipment to produce more products, or to produce products faster)
save/invest
and/or to hire some help for the smaller mundane tasks so you can stay in your zone of genius and keep creating. I love Upwork for this!
So yeah, it's important ;)
To add in profit, you first need to decide what your desired profit margin will be.
For a handmade business you're probably going to be in the range of 8-30% profit margin. However, take this with a grain of salt because you'll also need to consider how many products you'll be selling regularly.
As an example, if you're going for volume, you'll be able to maintain a lower profit margin percentage (closer to 8%) because you'll be producing and selling so many items. At the end of each month that lower percentage adds up quickly so you're actually doing very well.
If you are selling less items that maybe take longer to create and you're selling them at a higher price, in that case you might be looking at a much higher percentage. This would suit a business that has a very labor intensive creation process like embroidery, or a brand that is positioned as more luxury or high end.
Once you know your desired margin, it's quick and easy to test how your pricing will look. Take the percentage and:
1. convert it to a decimal
2. subtract that decimal from 1
3. divide your product cost (materials + labor + overhead) by the number you got in step 2
4. subtract your product cost (materials + labor + overhead) from the number you got in step 3
The number in step 4 will give you the amount you'll need to add to each item as profit. And the number in step 3 is your price with the profit baked in.
Obviously your profit markup will vary between each product you sell because each product has different material and labor costs involved. So make sure to do this same exercise for each product you're selling.
Let's do a quick example because I got you, my right brained friend.
I'm going to sell bird houses in this example. (Side note - still not sure what to sell? Check out my post on crafts that make money!)
Ok so each bird house takes me 1 hour to build, paint, and seal. I am paying myself $15 an hour.
My material costs for 1 birdhouse is $7.
My overhead costs per item are $4 and I want to build in a profit margin of 20%.
I am not positioned as a 'luxury' bird house vendor, but I do want to price and position my products as more high end and a quality product, so pricing is important here.
So let's do the math:
To get production costs, add up:
$7 material costs
$15 labor costs (1 hour x $15)
$4 overhead costs
and you get $26. If I want a profit margin of 20% then I:
1. Convert 20% it to a decimal (.20)
2. Subtract it from 1 (1-.20 = .80)
3. Divide the product cost by the number in step 2 ($26/.8 = $32.50)
4. And as a bonus, I can subtract $26 from $32.50 to get $6.50 which is the actual dollar amount of profit I need to add to each product.
The important number here is $32.50, which is your price that includes profit...but there is still one more thing to consider (I know.) So let's now get into....
Wholesale vs. Retail Pricing for Handmade Goods
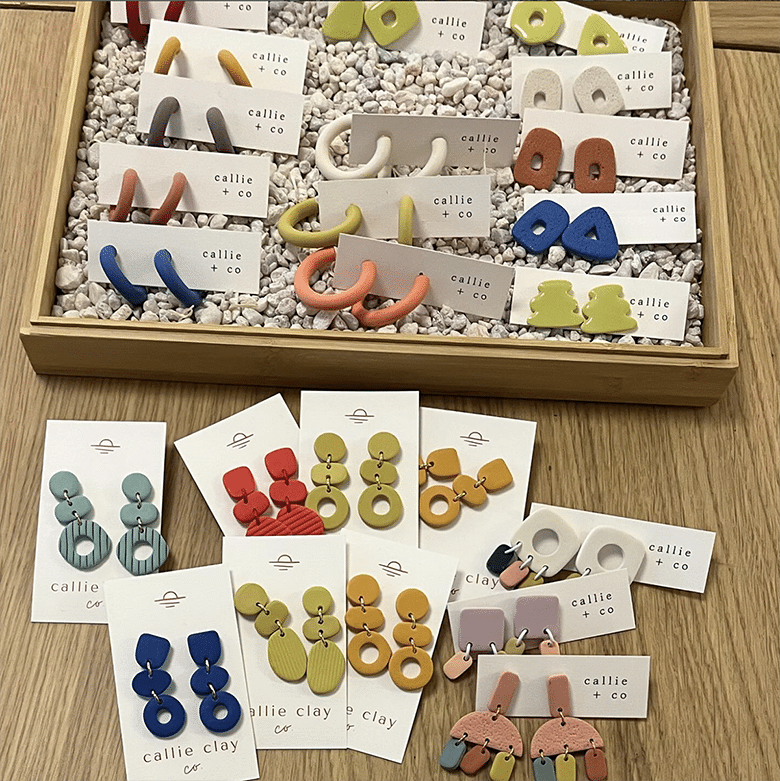
Photo: Local Take x Callie + Co
We just did a ton of math and it was the worst! And we still have a little more to go...but don't worry, you already made it through the hard part.
Are you thinking about selling in shops? It's actually really fun to see your work in a shop for the first time. For me, it never gets old. But there's a lot more to consider with your pricing when you go this route.
As you may know, most shops will not purchase your products to sell in their shops at your normal retail pricing (meaning, the price that you're selling your product for online and/or at your craft shows, etc).
When you work with shops, you sell to them at what is called a 'wholesale' price. Which usually tends to be a standard 50% of whatever your retail price is.
So if you're selling small wall hangings for $125 retail at a craft show, then you will likely sell them to a shop for ~$62 each, depending on their split with you.
I can hear you thinking, why the heck would you do that? Wouldn't you lose money?
Nope. Not if you've set up your pricing correctly. Because when a shop places a wholesale order with you, they are not just buying one item from you, they are buying an entire batch of your product (or even multiple products). PLUS, you have already included the profit in your wholesale price you sneaky sneak, you...
What's great about wholesale is that you have an agreement upfront that the shop will pay you for a larger batch of your product. Even better, you can set a minimum order so you can ask for the exact amount of pieces you know you need in order to make it worth your time.
But before we get into that it's absolutely critical to get your pricing right. And that's why we already did all that hard work just now to account for EVERY aspect of your price so you can be positive with every sale you make, you're making money and never losing any. Give yourself a pat on the back :)
Many artists do this all backwards. They jump in fast and pick random pricing based off of materials and labor costs, then they get approached by a shop. They get so excited about the opportunity that they don't consider what selling wholesale could mean for their profit margins.
They end up losing money selling products they shouldn't be selling at wholesale prices and just in an overall bad situation.
If you're considering selling wholesale, when looking around for a wholesale pricing formula, you'll probably see this one pop up pretty often. I’m showing you this, but to be clear, DO NOT PRICE THIS WAY! :)
First, add your material costs to your labor costs:
Material + Labor = Cost of Production
Then you take that number and multiply by 2:
Cost of Production x 2 = Wholesale Price
Then you multiply your wholesale price by 2 again:
Wholesale Price x 2 = Retail Price
Pretty straight forward, right? This formula has been circling the internet a while, and this is how I was taught to price my crafts as well. It might look ok at first glance because it seems you've accounted for both retail and wholesaling pricing in case a shop comes along.
However, because we just went through the entire pricing process, and now that you are a pricing genius, you can easily see that there is a big problem with this pricing formula.
At no point does this formula have you add in your profit. Or your overhead expenses.
It's just not accurate enough and can result in you accidentally losing money over the long term. So you can throw this one out the window :)
Since you've already discovered your base price which includes materials, labor, overhead, and profit...if you want to sell wholesale, that number you just came up with is actually your wholesale price.
So in the previous example, the $32.50 is your wholesale price for each birdhouse you sell a shop. Then you would double that to get your retail price ($65/each) which is what you would sell them for at a craft show or in your own online shop.
(…you don’t have to fully double the price if it seems excessive, it could be adding in anywhere from 60% of the price to 100%, but it should be significant).
The next very very important thing to understand is that not all products are made for wholesale. You need to know which products make sense to sell at wholesale pricing, and which are absolutely not worth it!
Think about it this way, if you do beaded embroidery and it takes you hours to finish one item, your labor costs will be through the roof. You may be able to get a few high end retail buyers for that product and make your money back, but selling the same item at half price will never make up for that lost labor cost. It's ok to let a shop know that a product isn't available for wholesale.
(Also, if they insist, you can always alter the product so that it takes less time to make. For example, only embroider one section, or skip the embroidery entirely. You're the artist!
Photo: Animal Instincts Apparel
The Psychological Aspect of Pricing: Perceived Value and Pricing Tactics
Understanding Perceived Value
Perceived value is one of my favorite topics. I think of it as a puzzle, for example, "If my retail prices are high for what my product generally sells for (either because you have a high profit margin, high production costs, or you just want to project luxury), how can I make it seem like it's worth it?"
This is where it's good to do some research and where it's super valuable to know your ideal customer and their habits well. Seeing what pricing other similar products are selling for and understanding what range a consumer pays for a similar item can help you position your product better.
However, just because your price is higher than others doesn't mean you can't sell it. You don't always have to sell at a 'reasonable price'. It's all about positioning. Positioning is just a fancy way of saying the way you market your product.
If you're selling hot dogs, you could position it as a no nonsense cheap eat with no frills and charge very little, hoping that you get a high volume of sales to hungry tourists and people on the go (think hot dog cart NYC!).
Photo: Delish
Or you could sell it as gourmet - get a higher quality bun and dog, sell it with an assortment of artisinal toppings and serve it with a side so you can charge $15 to Upper West Side families taking their kids out to lunch post baseball practice. You're not selling as many, but you're making more with each sale.
Same product, different positioning. And this is where perceived value comes in.
Obviously if you go the gourmet route you'll have to be spending a little more for the nicer quality hot dogs and buns, plus toppings...but not that much extra. Because of the way you're selling the gourmet dogs you can easily double the price of the cheap hot dog. But that doesn't mean your expenses to make the hot dogs doubled.
So to translate this to your business...if you want to charge a higher price, make it clear why the price is higher. Improve your packaging, use higher end materials, add in an additional item to the product.
This is also why branding for creative entrepreneurs is important - it helps you create perceived value later down the road when you’re pricing.
So even though it's not costing you a ton to make these small upgrades, you can increase the price significantly because of them.
Strategic Pricing Tactics
We've talked about how to price your handmade items for retail and wholesale...but what about offering discounts and sales?
When it comes to your pricing strategy, it's up to you to decide if discounting your products is something you want to do.
If you pay attention to different companies, you may notice that they NEVER run sales...or only very rarely. This is intentional, because it all comes back to perceived value. If you're constantly offering sales and marking your crafts at a discount price, then your customers have no incentive to buy at full price....because they know you'll be running a sale soon.
I'm not saying it's bad to run a sale, but be intentional about it. One idea would be to run 2 flash sales a year to clear out old inventory and make some quick cash. In my experience, running limited sales for only 48 hours brings in a predictable amount of money 2x a year for VERY little effort.
Think about what type of sale makes the most sense for your products and your business and start implementing into your yearly schedule regularly!
Adjusting Your Prices: When and How to Reevaluate
Remember when earlier I told you that if you needed to change your pricing later down the line it was A-ok?
If you're now at the point where you've started selling your products for a bit and you have a clear idea of what's working and what's not, then you can start reevaluating your pricing.
Adjusting prices is a delicate balancing act, so doing more market research here definitely won't hurt. Before making any changes, go research similar products and what they are selling for (and what features, materials, positioning they have).
You don't have to match pricing with the other products by any means, but you can use those numbers as a guide to pricing your own.
For example, if you've been selling hand printed pillow covers at a similar low price to other shops and you realized that you've become resentful of the low price because they take so much effort to make, then you probably didn't price those correctly originally and need to increase the price - BUT also consider the demand you've been getting.
If they are a popular product priced low, and you increase the price, your sales will likely slow down, but you'll be making more per sale. Depending what else you're selling, this may or may not be ok. Take the full picture into consideration when updating prices.
Another reason you may consider increasing your prices could be that you have a popular product that you have improved upon. Over time, you SHOULD increase your pricing on your products. Every time you make it you're getting better and faster and making the product better quality. Your pricing should reflect that.
Sometimes the costs of your materials increase as well. You'll need to adjust your pricing in that case too. Can you price too high? Yep. How will you know if you've priced too high? Well, were sales coming in consistently and they suddenly stopped? That's a good sign!
When it comes to competitive pricing, be careful! It's fine to be priced lower or higher, but do it with intention and make it obvious why that pricing exists. This can be made clear through your marketing, the way you talk about your product, and your listing descriptions.
Advanced Pricing Techniques and Tools
Pricing your crafts can be intimidating. That's why many artists turn to software or a pricing calculator to help them get it right. However, be careful when using these methods because like we covered earlier in this post, pricing is both an art and a science.
Advanced pricing methods such as using a calculator can help you account for your overhead, material costs, labor costs, and wholesale vs retail pricing, but it can't gauge perceived value.
If you do want to use a calculator, what I would suggest is to use it only as a starting point to find your base numbers. But additionally, do your own research to wiggle those numbers around so they make sense for the positioning of your product.
Before choosing a pricing calculator, you'll also want to understand how the calculator is creating the numbers it's giving you, because it may be using a percentage that isn't standard for your craft, location, etc. These numbers can vary greatly!
Another big part of pricing your products is the testing phase, when you actually put your products up for sale and see if they sell at that price. A calculator might tell you that your price should be $47, but if the product isn't selling over an extended period of time, it's possible that you may need to adjust it.
Mastering Pricing for Handmade Success
Hopefully by now you've gotten a little more clear on the best way to create successful pricing for your products. There is a LOT to consider when you want to sell handmade items, but you really do need to account for everything so you make sure you turn a profit in the end.
The trick is to make sure you're covering ALL your expenses, paying yourself fairly, and baking in a healthy profit along the way. Pricing handmade items the right way will ensure that your business continues to grow over time and you can not only expand, but feel good about the prices you're charging.
